While the process of installing locks may seem complex at first, it can be a simple DIY project! These projects are easier and more affordable than they look while requiring little to no previous skills. If you ever find yourself in a situation where you’re having a problem with one of your locks—be it trouble unlocking or locking your door—you should never brush it under the rug since an issue like this can be a major inconvenience and even a big security risk. This FAQ page is going to explain two handy tutorials; the basics of how to install a door knob and how to install a deadbolt. Remember, if you attempt one of these projects and it seems too overwhelming or confusing, don’t hesitate to contact a locksmith.
How to Install a Door Knob
Is it time to update your old door knobs for a new look? Or did one of your door knobs break? Whatever your reasoning for replacing them, you don’t know how to do it, and you’re eager to learn. Replacing a door knob is a simple task that just about anyone can do with the right instructions. Before shopping for a new door knob, remove the old one as a reference for your replacement door knob. This process has two parts; removal and installation.
Removal
Before installing a new door knob, you have to remove the old one first. You can remove the old door knob by using a Philips screwdriver. Start on the inside of the door, remove the inner door knob, then pull the exterior knob off the other side of the door. After you’re finished, remove the latch plate—which is on the inside edge of the door—by removing its screws and then pulling it out. Then, remove the strike plate attached to the door frame by using your screwdriver to remove both screws. Most importantly, you’ll need to measure the backset, so you can determine which type of door knob you need to purchase. The backset is the distance from the door knob hole to the edge of the door.
Installation
Once you’ve removed all parts of your door knob, you’ll need to purchase a new door knob, latch plate, and strike plate from your local hardware store before you can get started on the installation process. To determine what type of latch plate to buy, you’ll need to look at the mortise—cutout impression the latch sits in. After making all the necessary purchases, get started by inserting the new door knob latch on the inside edge of the door, and securing it with the screws provided. Next, you’re going to install the door knob by sliding the spindle through the slot on the latch. The spindle is a long metal piece that sticks out of the outer door knob. Secure the door knobs and then attach a new strike plate using the provided screws.
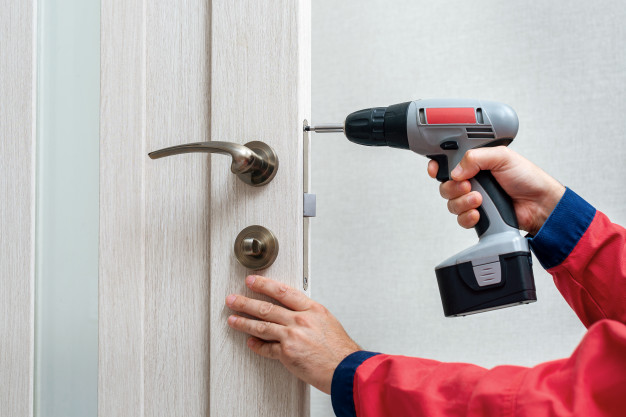
How to Install a Deadbolt
To get started you’ll need to gather a few different materials:
- Tape measure
- Combination square
- Electric drill with a hole saw and spade bits-use the correct sized drill bits according to the deadbolt lock set
- Screwdrivers
- Chisel
- Pencil
- Deadbolt lock set-this will come with a template to help you with your measurements
If you’re missing some of these items, you can pick them up from your local hardware store or order them online for your convenience.
Step 1: Fitting the Deadbolt
For this step, you’ll need to grab a pencil, tape measure, and a combination square. Measure six inches above the center of the door handle and mark with a pencil—this is where you’re going to install a deadbolt lock. Next, place the combination square on the edge of the door and draw a horizontal line through the mark and a few inches beyond. Continue drawing the line along the back of the door and stop when the line is symmetrical to the front. Wrap the template—provided in the deadbolt lock set—around the edge of the door while aligning its center with the marks on the door. You can use tape to hold the template in the proper position.
Step 2: Mark and Drill
Use a nail to mark the middle of the hole for the lock cylinder on the face of the door. Mark the latch bolt assembly on the side of the door as well. Then, bore the hole for the lock cylinder using a hole saw, and afterward, use a 1-inch spade bit to make the latch bolt hole on the edge of the door.
Step 3: Insert the Faceplate
Place the latch bolt assembly on the edge of the door and use your pencil to trace the faceplate. Now, remove the assembly and carve a mortise—using a chisel—that is deep enough so the faceplate will be level with the edge of the door. Once you’re finished chiseling, drill two ⅛ inch holes and secure the latch bolt assembly to the door using screws.
Step 4: Fit Lock Cylinders to the Door
Insert the keyed portion of the lock in the big hole, so it extends through the latch bolt. Next, you need to fit the inside cylinder in the hole, making sure that the screw holes for both sides line up. Secure using two screws.
Step 5: Fitting the Strike Plate
You can fit the strike plate by closing the door and marking a spot on the door jamb where the latch bolt meets it. Then you’re going to use the strike plate as a template and trace it onto the door jamb. Chisel out a mortise on the door jamb. Secure the strike plate with screws. The only thing left to do is test out your new deadbolt!